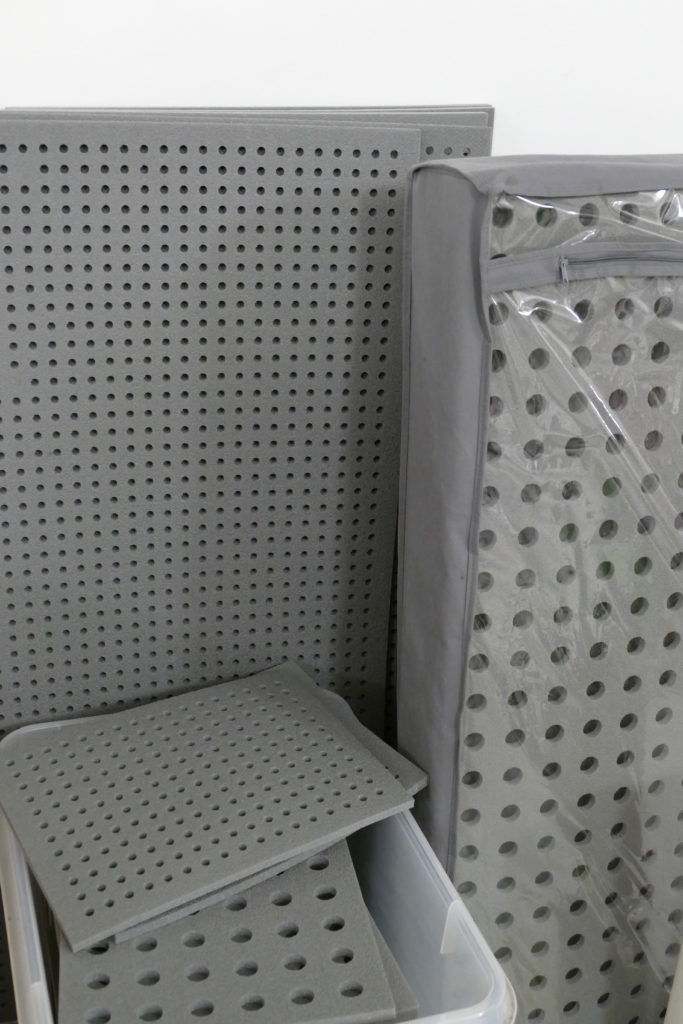
Button base for felting
is developed for making felt making even more joyful and easier! There are two sizes of the button bases – base with big holes and base with small holes. Button bases are very light, they dry easily, and you can use them multiple times for your designs.
Small button base is great for making samples and tests or smaller designs that you can attach later to something else or keep as they are. Big button base will allow you to create scarfs, jewellery, fabrics for clothing or for home décor etc. It will also give you the possibility for example to make vest pattern straight on the button base. Make different designs with changing the widths of the support/button strips, add other materials to them and create exciting new button surfaces. There are no limits in using these button bases, just be creative with them!
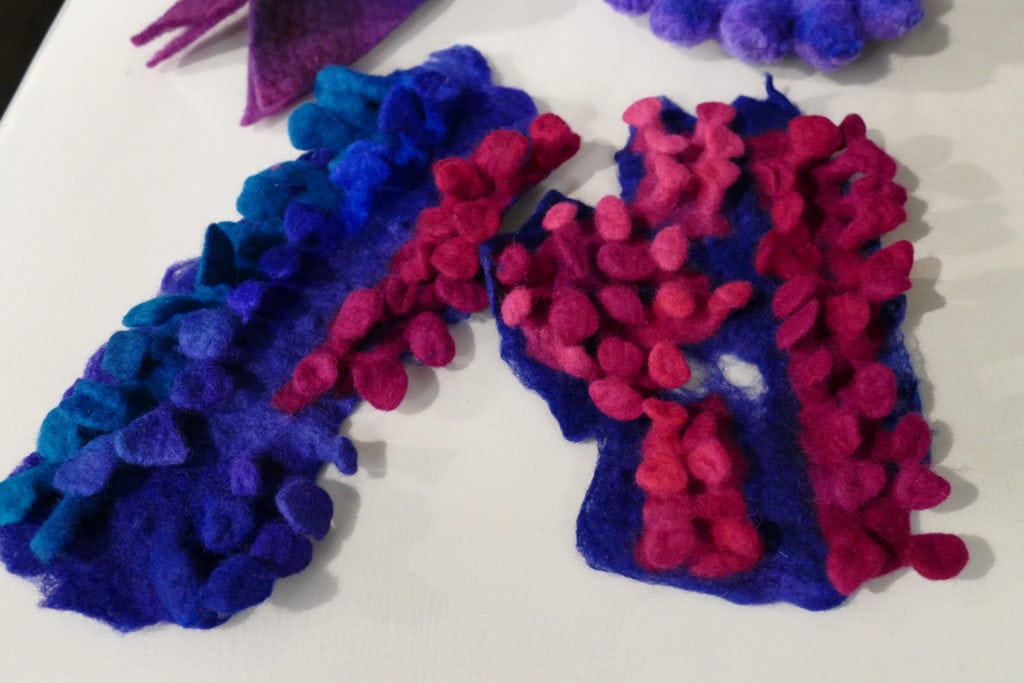
If you wish not to cut strips from Ohukainen, but you wish to make surface with balls here is a tip for you. You can use large piece of Ohukainen, press it in the holes of the button base and fill them with leftover wool and close the balls from the roots with sewing yarn or small rubber bands.
Be creative and have fun!
Instructions
For buttons you need hand dyed Ohukainen* (100% merino wool, 150g/m2) or Lumi* (100% merino wool, 150g/m2) and the following tools for felt making:
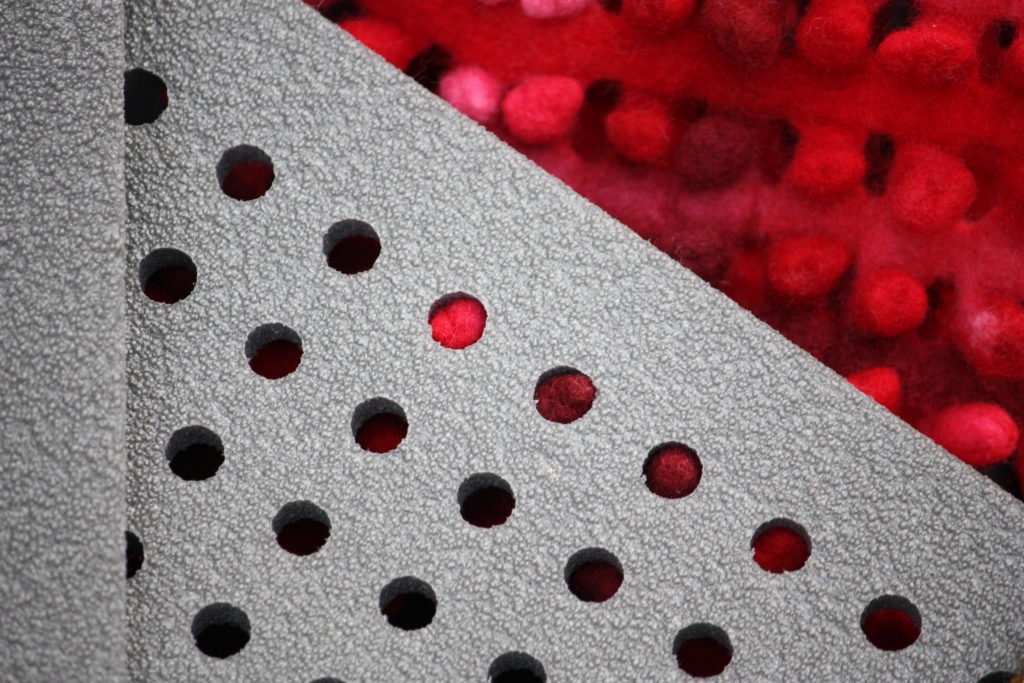
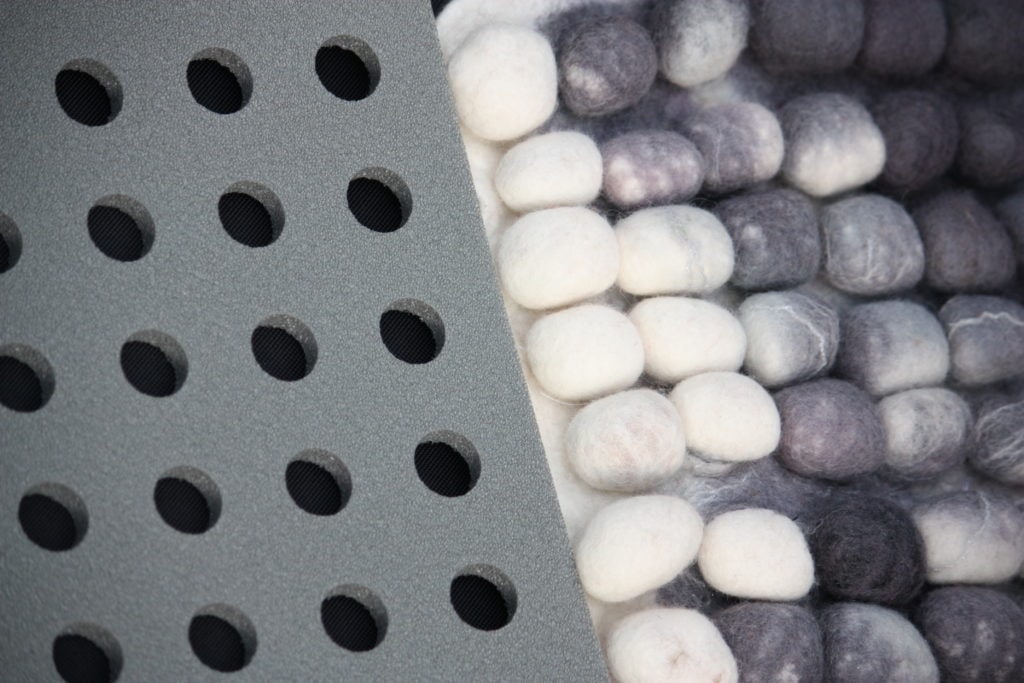
- Button base (with big or small holes)
- Good scissors
- Felting needle (Short Pro or Special Pro)
- Needle felting pad
- Felting mat
- Bubble plastic
- Small piece of cloth for rolling
- Marseille-soap
- Kettle and a bowl for hot water
*available only at Felt Faction
Cutting
- Cut pieces with two different widths from Ohukainen.
- Support strips (for smaller holes 1cm, for bigger holes 2cm)
- Button strips (for smaller holes 2cm, for bigger holes 4cm)
Building
- Needle punch support strips very lightly between hole rows of the button base.
- Needle punch thoroughly the ends of the strips to the ends of the button base.
- Needle punch the button strips only from the ends.
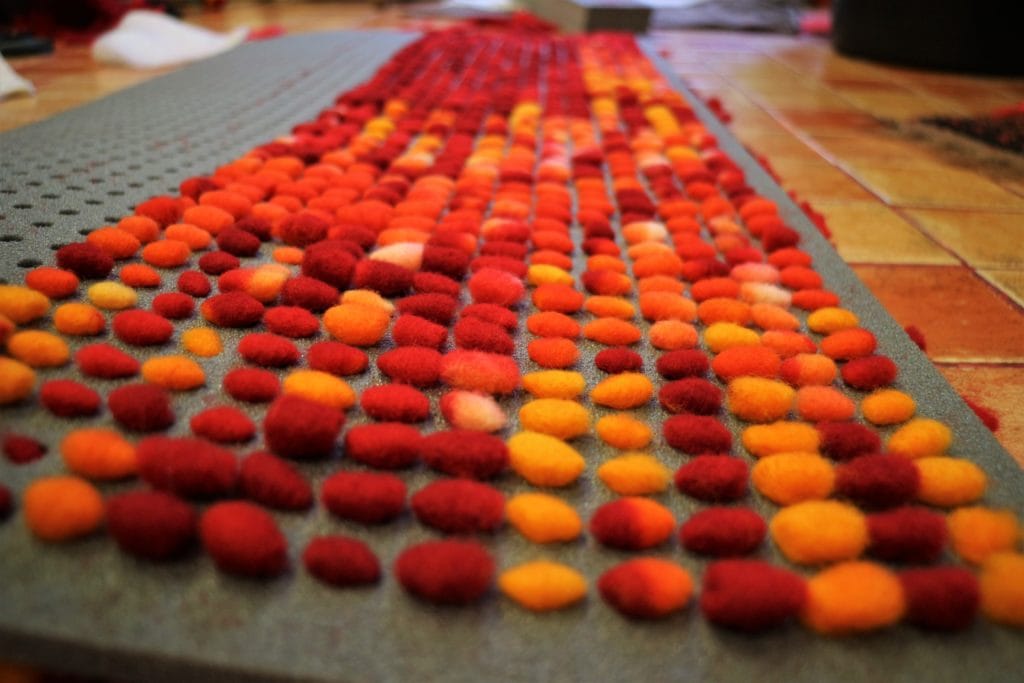
- Fill holes with the button strip. You can use pencil or your fingers as a tool in placing the strip through the holes. Make sure you have enough material for the buttons, these need to be long pieces! If the strips are not long enough, do not stretch them. Buttons take surprisingly lot of material. Turn your button base every once in a while, and check that the buttons are approximately same size. Strips can go over the base, you can cut the extra away later (after throwing phase).
Wet felting
- Place felting mat on your workstation.
- Boil water. Place it on bowl and add soap to blend in a little.
Mix cold water in, keep water hot but not too hot to handle.
- Place bubble plastic under the button base, bubbles towards the button base.
Take enough bubble plastic to go under and over the button base piece you are working with.
- Add soapy hot water to the buttons thoroughly.
Don’t touch buttons with your hands at this point.
- Place bubble plastic on top of the buttons
Start felting with circular motion on the bubble plastic. Repeat from both sides few times. Add some soapy water on top of the plastic so your hands move on it better.
- Start rolling.
Use piece of cloth to help you with it. Roll the button base with bubble plastic inside the cloth and start rolling. First gently and add more strength as you go. Open roll from time to time and add more hot soapy water, so it stays hot.
- Open the roll.
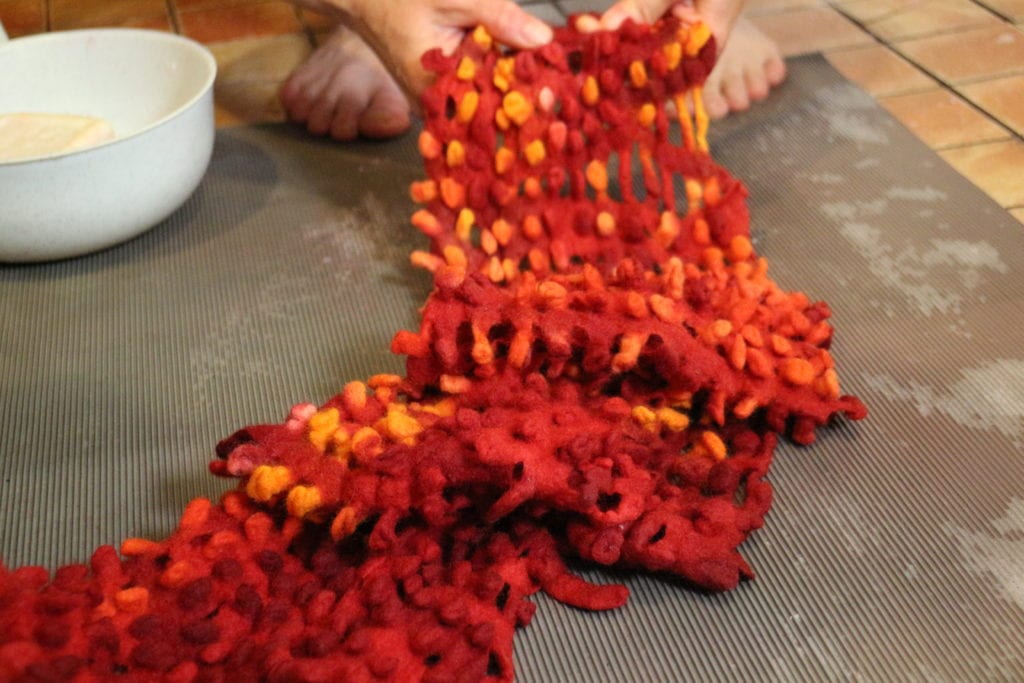
Check that strips are felted together (if they are not, keep rolling like before). Press buttons gently out of the button base. If buttons are felted together, detach them from each other.
- Press extra water out.
Keep it moist still.
- Start throwing it on the felting mat.
First gently and add more strength as you go. Keep throwing it until the surface is wrinkled. If you want, you can cut extra edges from the sides after the throwing phase.
- Add hot water and soap.
- Roll inside the cloth (without bubble plastic).
- Open the roll.
If you want your design to be longer, then “milk” it. Hold from the other end and pull it through with you other hand. Repeat this few times. This is not needed, but even a little felting like this will finish the edges of your design beautifully.
- Rinse your design until all soap is gone.
After this rinse with cold water. Cold closes the fibers.
- Press extra water out and leave the design to dry.
Enjoy and check out our Youtube channel for more felting tutorials!